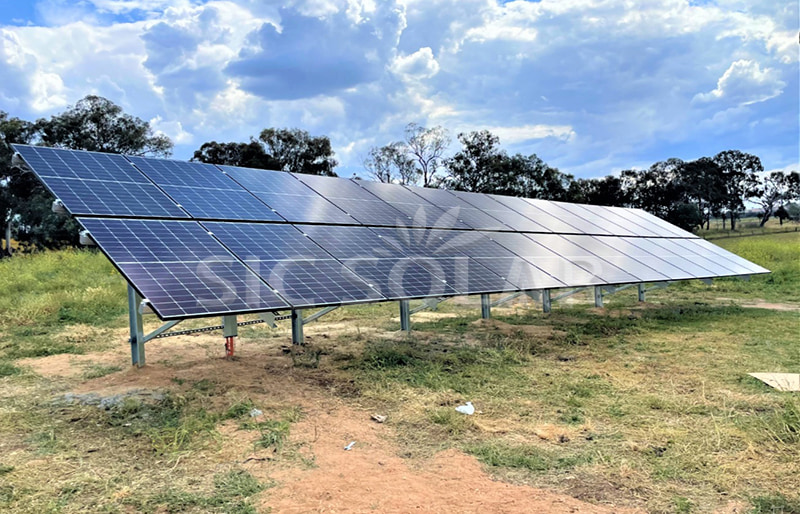
When installing a ground-mounted solar system, grounding is a crucial step to ensure safety, stability, and optimal performance. Grounding helps protect the system from electrical surges, such as those caused by lightning or short circuits, and it minimizes the risk of electrical shock. If done correctly, it also contributes to the overall longevity and efficiency of your solar energy system.
1. Why Is Grounding Important for Solar Systems?
Grounding is a safety measure that directs excess electricity, such as that from a power surge, to the earth, preventing it from damaging your solar panels, inverter, or other components. Without proper grounding, your system could be at risk of electrical faults or lightning strikes, which could cause serious damage or even fire hazards.
In addition to safety, grounding helps maintain the electrical integrity of your system. It stabilizes voltage fluctuations and provides a return path for electrical currents, ensuring the system works at its full capacity.
2. How to Ground a Ground-Mount Solar System
Grounding a ground-mounted solar system involves several key steps to ensure the system is properly connected to the earth. Here’s a general overview of the process:
A. Install Grounding Rods
The first step in grounding your ground-mounted solar system is to install grounding rods. These metal rods are driven deep into the ground to provide a direct path for electrical current to safely dissipate into the earth.
- Material: Grounding rods are typically made from copper or galvanized steel because of their corrosion resistance and excellent conductivity.
- Installation Depth: The depth of the grounding rods will vary depending on local codes and soil conditions. In general, they need to be buried at least 8 feet deep, although some areas may require deeper installation to achieve proper grounding.
Once installed, the rods will be connected to the rest of the grounding system via grounding wire.
B. Run Grounding Wire
Next, you’ll need to run a grounding wire from the solar array to the grounding rods. This wire ensures that the excess electrical current from the solar system is directed safely into the earth.
- Wire Type: Use thick copper wire or bare copper conductors to ensure the wire can carry excess current without overheating. The wire should be insulated to prevent any accidental contact.
- Connection Points: Connect one end of the grounding wire to the grounding bus bar in the solar inverter or combiner box. The other end should be securely attached to the grounding rods. You should also connect the metal parts of the solar mounting system to the same wire to ensure they are properly grounded.
SIC Solar offers highly durable grounding kits designed to simplify this process. These kits typically include grounding bars and connections to ensure that your solar array is grounded properly and efficiently.
C. Bonding the System Components
All metal parts of the solar system must be bonded together to create a uniform electrical connection. This includes the solar panels, racking system, and inverter. Bonding the system components helps ensure that there are no voltage differences between the parts, preventing potential electrical hazards.
- Bonding Straps or Connectors: Use bonding straps or connectors to link metal parts. Make sure that the straps are tight and secure, ensuring a reliable connection between the components and the grounding wire.
- Check for Continuity: Once all components are connected, test for electrical continuity to ensure that the entire system is properly grounded and that there are no weak connections.
D. Inspect and Maintain the Grounding System
After the grounding system is installed, it’s important to periodically check its performance. Grounding systems can degrade over time due to factors like soil erosion, corrosion, or poor connections. Regular inspection ensures the system remains safe and efficient.
SIC Solar provides maintenance guidelines and grounding components designed for easy inspection and long-term reliability, so you can be confident that your system is always operating at its best.
3. Tips for Proper Grounding of Ground-Mount Solar Systems
A. Follow Local Electrical Codes
Grounding requirements may vary depending on your location. It’s important to adhere to local electrical codes and standards to ensure your system is compliant and safe. In many cases, a licensed electrician will need to sign off on the installation.
B. Ensure Proper Connection of All System Parts
Ensure that all metallic parts of the system are grounded, including the mounting brackets and racking system. Any metal component in the system should be tied to the grounding system to prevent electrical hazards.
C. Use Grounding Kits Designed for Solar Systems
Using high-quality grounding kits that are designed specifically for solar systems will ensure that the components are compatible and will perform optimally. SIC Solar offers specially designed mounting systems and grounding kits that simplify the process and ensure a reliable installation.
D. Protect the Grounding Rods
Once your grounding rods are installed, ensure they remain in good condition by protecting them from corrosion or physical damage. Avoid placing heavy objects on top of the rods or installing them in areas where they might be subject to impact or excessive moisture.
4. Why Choose SIC Solar Grounding Solutions?
SIC Solar offers an array of solar mounting systems and grounding solutions that are designed with durability, safety, and ease of installation in mind. Our products are made from corrosion-resistant materials, ensuring that the system remains grounded and stable even in harsh weather conditions. With SIC Solar grounding kits, you can rest assured that your ground-mounted solar system is fully compliant with safety regulations and will operate efficiently for years to come.
