As the global adoption of solar energy continues to rise, the proper installation of solar panel roof brackets has become a critical step in ensuring the structural integrity and efficiency of solar power systems. Roof brackets serve as the primary connection between the solar mounting system and the roof, providing stability, durability, and long-term performance.
This guide will provide an in-depth, professional approach to installing solar panel roof brackets, covering different roof types, installation methods, and best practices for a secure and reliable solar mounting system.
Understanding Solar Panel Roof Brackets
Solar panel roof brackets are key components of a photovoltaic (PV) mounting system, designed to support solar panels while ensuring minimal impact on the roof structure. These brackets vary based on roof type, local climate conditions, and load-bearing requirements.
Types of PV Roof Brackets by Roof Material
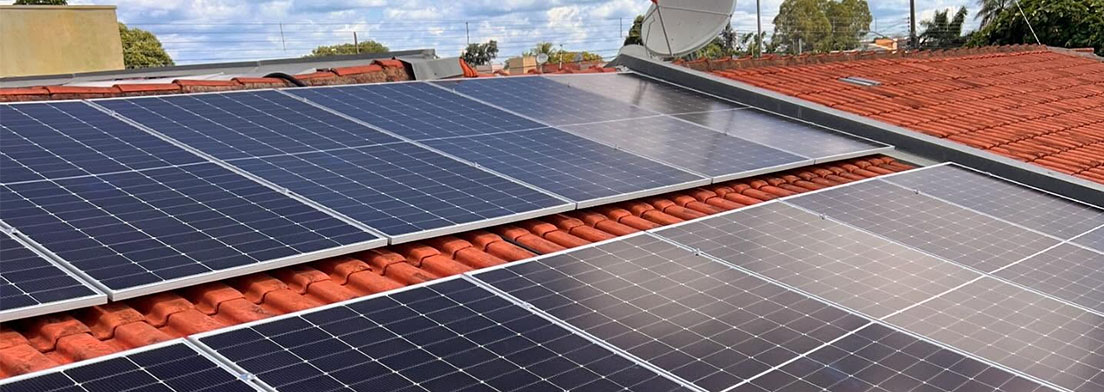
· Tile Roof: Utilizes hanger bolts, tile hooks, or aluminum plates for secure attachment.
· Metal Roof: Includes L-feet, standing seam clamps, or mini-rail systems to minimize penetrations.
· Asphalt Shingle Roof: Requires flashing-mounted brackets to prevent water leakage.
· Flat Roof: Often uses ballast-mounted brackets or penetrating anchor systems for stability.
Each type of bracket ensures compatibility with different roofing materials while maintaining optimal weight distribution and structural strength.
Step-by-Step Installation Guide for Solar Panel Roof Brackets
Step 1: Site Evaluation and Preparation
Before beginning installation, conduct a thorough site assessment to ensure:
· The roof structure can support the additional weight of the solar system.
· The selected bracket system is compatible with the roof material.
· The installation complies with local building codes and wind load requirements.
Step 2: Measuring and Marking the Bracket Positions
· Create a roof layout plan to determine the optimal bracket placement.
· Mark precise mounting points, ensuring even weight distribution across the roof.
· Align bracket positions with the rafters or structural support beams for maximum stability.
Step 3: Installing the Solar Roof Brackets
A. Solar Tile Roof Bracket Installation
1. Carefully remove or adjust tiles where the brackets will be installed.
2. Drill pilot holes and insert hanger bolts or stainless steel fasteners into the rafters.
3. Apply weatherproof sealing around penetration points.
4. Secure the aluminum mounting plate or tile hook.
5. Reposition the tiles and ensure a flush fit.
B. Solar Metal Roof Bracket Installation
1. For corrugated or trapezoidal metal roofs, attach mini-rails or L-feet using self-tapping screws.
2. Use EPDM sealing gaskets to prevent leaks at penetration points.
3. For standing seam roofs, utilize non-penetrative clamps to secure the brackets.
C. Solar Asphalt Shingle Roof Bracket Installation
1. Lift the shingles and install flashing to create a waterproof barrier.
2. Drill holes and insert lag bolts into the rafters.
3. Secure the brackets and apply sealant to ensure a watertight connection.
D. Solar Flat Roof Bracket Installation
1. Use ballasted mounting brackets to avoid roof penetrations where possible.
2. For penetrative mounting, secure anchor bolts and apply waterproofing measures.
3. Adjust the bracket tilt angle for optimal solar exposure.
Step 4: Attaching the Solar Mounting Rails
· Secure the horizontal or vertical mounting rails onto the installed brackets.
· Ensure proper alignment, tightening all fasteners for maximum stability.
· Double-check the structure for leveling and weight distribution.
Step 5: Installing the Solar Panels
· Place the solar modules onto the mounting rails.
· Secure them using mid-clamps and end-clamps, ensuring a firm connection.
· Tighten all fasteners and inspect for stability.
Step 6: Final Inspection and Safety Checks
· Perform a torque check on all connections.
· Apply additional sealant if necessary for enhanced waterproofing.
· Conduct a structural integrity test before proceeding with wiring and electrical connections.

Best Practices for Secure Solar Bracket Installation
✔ Use High-Quality Materials: Opt for corrosion-resistant aluminum or stainless steel brackets for longevity.
✔ Ensure Proper Waterproofing: Utilize EPDM gaskets, flashing, and sealants to prevent leaks.
✔ Follow Manufacturer Guidelines: Adhere to specific installation requirements for each bracket type.
✔ Account for Wind and Snow Loads: Design the system to withstand local environmental conditions.
✔ Regular Maintenance Checks: Periodically inspect bracket connections for any signs of wear or loosening.
Conclusion
The correct installation of solar panel roof brackets is crucial for ensuring long-term system stability and efficiency. By selecting the right bracket type, following proper installation procedures, and maintaining strict waterproofing measures, installers can maximize the durability and performance of a solar PV system.
With advancements in solar mounting technology, the industry continues to evolve, providing cost-effective, efficient, and structurally secure solar mounting solutions for various roof types. Investing in high-quality materials and professional installation ensures a reliable and high-performance solar energy system.