Where is the best place for solar panels on a roof?

Properly installing solar panels on your roof is essential to maximizing energy productivity. Factors such as the roof's orientation, tilt angle, shading, and local climate can all affect the best location. Here's a detailed look at what you need to consider when planning your solar panel installation location for optimal performance and efficiency.

1. Orientation: South-facing for Maximum Sunlight

In the Northern Hemisphere, south-facing roofs typically receive the most sunlight throughout the day and are ideal for solar panel installations. This orientation allows solar panels to capture maximum sunlight, which increases energy productivity. If your roof is not south-facing, east- and west-facing orientations can still be used, although they may capture less total sunlight. North-facing roofs typically receive the least direct sunlight and are generally not suitable for solar installations.

2. Tilt Angle: Finding the Optimal Angle

The tilt angle of a solar panel can also affect its efficiency. Ideally, the angle of the panels should match the latitude of your location to optimize sunlight exposure. For example, in an area with a latitude of 30 degrees, a 30-degree panel tilt helps maximize sunlight capture. In some areas, seasonally adjusting the tilt may further increase energy production, but this may require specialized mounting.

Fixed tilt angles may be more cost-effective, but companies such as SIC Solar offer adjustable tilt mounts that allow seasonal adjustment to improve efficiency, which is useful in areas where the angle of sunlight changes significantly seasonally.

3. Avoid shaded areas

Even a small amount of shadow on a solar panel can significantly reduce energy production. Rooftop features such as trees, chimneys, neighboring buildings, or vents can cast shadows that reduce efficiency. To avoid this, perform a shadow analysis to identify any potential obstructions. Adjusting panel positions to bypass shaded areas or using technologies such as microinverters, which optimize the output of each panel individually, can also help minimize shading losses.

4. Roof Type and Material

Certain roof types are better suited to solar panels because they are durable and easy to install. For example:

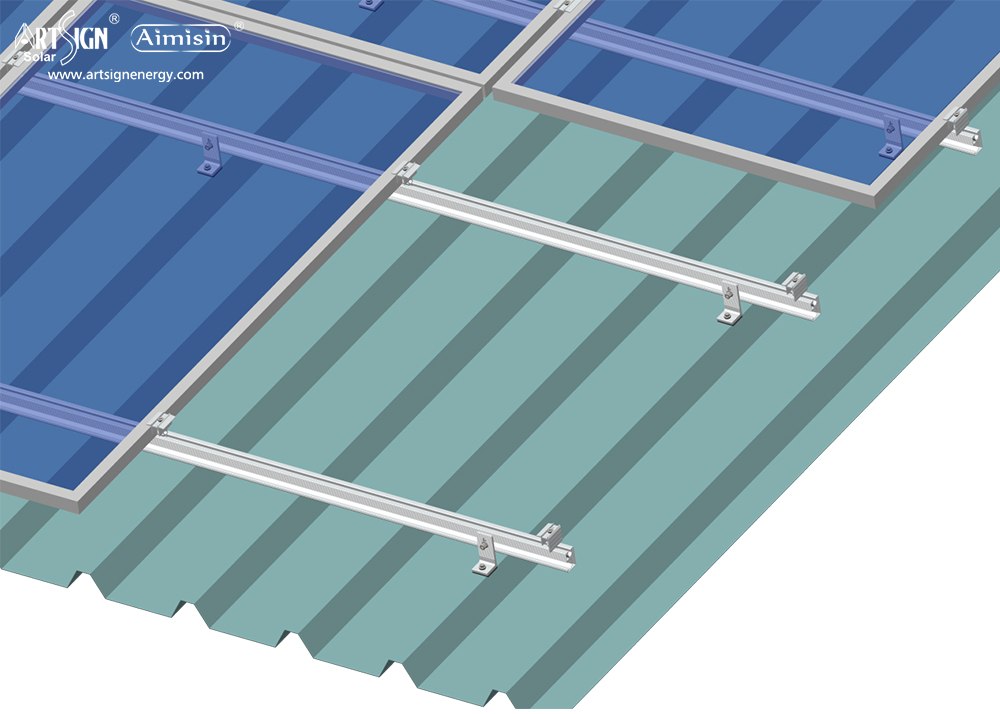
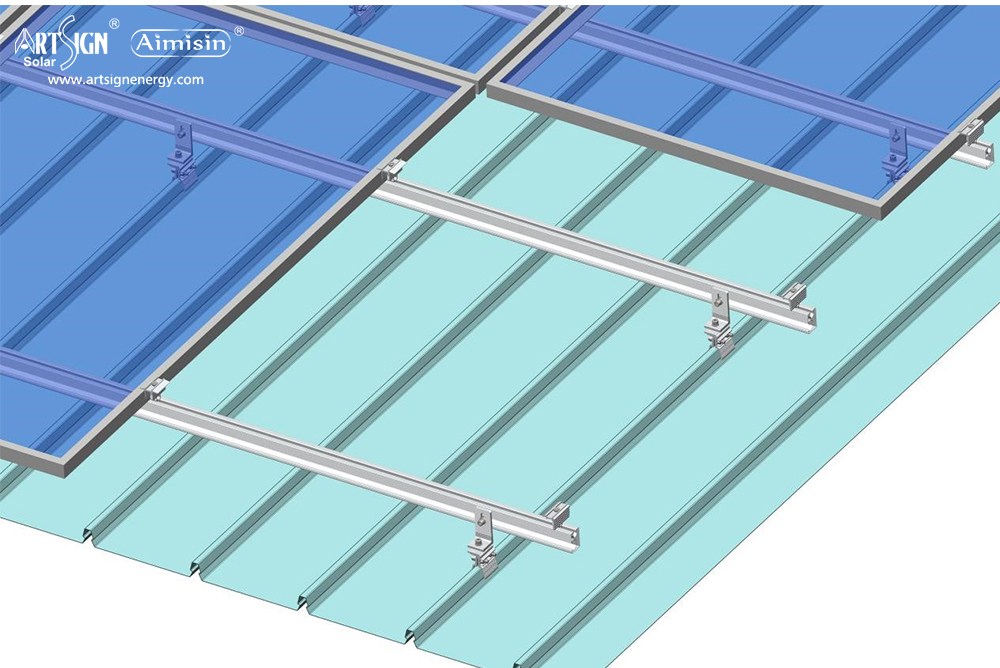
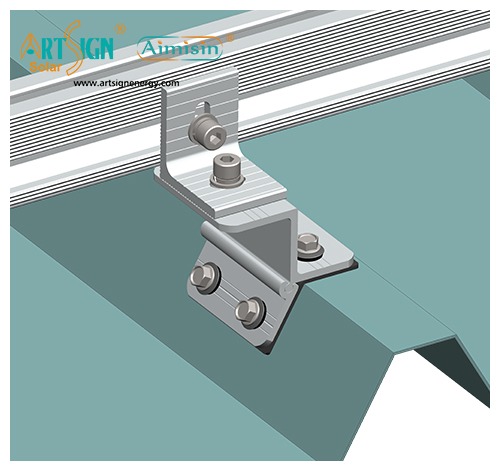
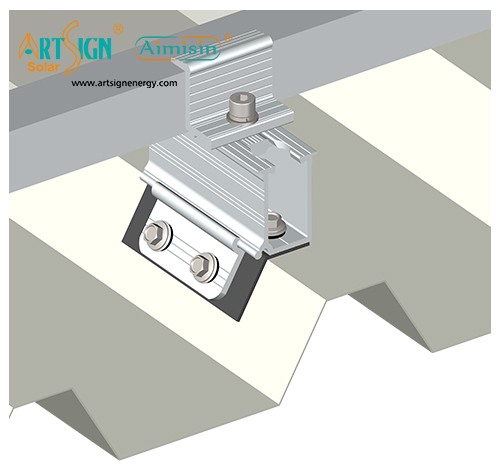
Metal roofs: Standing seam metal roofs are particularly well suited to solar because solar panels can be installed without penetrating the roof, maintaining the integrity of the roof. SIC Solar offers mounting systems compatible with metal roofs, which are popular for their durability and ease of installation.

Asphalt Shingles: Asphalt shingles are the most common type of residential roof that can be directly solar mounted using a bracket system that holds the solar panels in place and minimizes roof penetration.

Tile Roofs: While tile roofs require more complex mounting techniques to avoid damaging the shingles, they can still be a great foundation for solar if the proper brackets and mounts are used. SIC Solar offers mounting solutions designed for delicate materials like shingles, ensuring stability without damaging the roof.

5. Roof Condition and Age

Before installing solar panels, it is important to ensure that the roof is in good condition. Roofs with a remaining life of at least 10-15 years are ideal; otherwise, you may need to replace or repair the roof before installation. SIC Solar ​​mounting systems are designed to be rugged and durable, minimizing the need for adjustments or removal over time.

6. Local Climate and Weather Considerations

In areas with heavy snowfall, panels placed at a steeper angle will allow snow to slide off more easily, reducing potential shading and weight on the panels. Similarly, in windy areas, panels should be securely mounted using sturdy brackets, such as those provided by SIC Solar, to withstand high wind loads.

7. Accessibility for Maintenance

Solar panels require minimal maintenance, but may occasionally require cleaning or repair. Position the panels in relatively accessible areas so that you or a maintenance team can reach them safely. For example, placing them near the edge of the roof or on a more accessible section can simplify future maintenance.

solar panel brackets for tile roof

Make the most of your roof with SIC Solar ​​solutions

SIC Solar is a leading manufacturer of photovoltaic mounting systems that offers a range of options to help you secure your panels in a position that best suits your roof type and location. Whether your goal is to achieve maximum efficiency, aesthetic integration or maintain the integrity of your roof, its high-quality mounting systems ensure durability and adaptability to different roof styles.

By carefully considering the direction, pitch, shading and other roof factors, you can choose the best location for your solar panels to produce the highest energy output. A thoughtful approach to installation will ensure that your solar installation is long-lasting and efficient, maximizing your investment in renewable energy.

Are Solar ground screws better than concrete piles?

When installing a solar panel system, especially for ground-mounted installations, the choice of foundation plays a vital role. Two common types of foundations for securing solar structures are ground screws and concrete piles. Each type has its advantages and disadvantages, but which is better for solar installations?

Learn about Solar Ground Screws

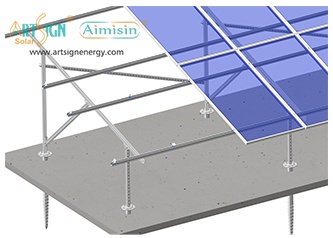
Solar ground screws are steel anchors that are drilled directly into the ground to support solar mounting systems. Unlike concrete foundations, ground screws require no excavation or wet concrete, making them a quick, efficient option for a variety of soil types. They come in a variety of lengths and diameters to accommodate different site conditions, and companies like SIC Solar manufacture high-quality ground screws to ensure durability and stability for ground-mounted solar panels.

Benefits of Solar Ground Screws

  1. Faster Installation Ground screws can be installed quickly without extensive foundation work, making them ideal for projects that require speed. Unlike concrete piles, which require curing time, ground screws can be installed and ready for panel installation in a matter of hours. This efficiency helps keep project timelines on track, especially for large solar farms or commercial projects.
  2. Minimal Impact on the Environment With ground screws, there is no need for excavation or heavy machinery, which minimizes damage to the soil and protects the natural landscape. This is particularly beneficial in environmentally sensitive areas, where minimizing the ecological footprint is critical. Since ground screws can be easily removed when needed, they also allow for better site recovery after a solar project ends.
  3. Adapts to a variety of terrains Ground screws are suitable for a variety of terrain types, including uneven, rocky, or sloping areas. They can adapt to different soil conditions, which provides project developers with greater flexibility. Concrete piles, on the other hand, typically require flat, stable ground and may not perform well on uneven or rocky surfaces.
  4. Reduced Labor and Costs Since ground screws require less labor and time to install, they can reduce overall project costs. Additionally, they do not require specialized equipment or a lengthy curing process, making them a cost-effective option, especially for large installations.
  5. Increased Durability and Stability High-quality ground screws, like those from SIC Solar, are corrosion-resistant and can withstand varying weather conditions. This makes them a reliable choice for long-term installations of solar facilities, ensuring a solid foundation that will last.

Challenges of Using Ground Screws

  1. Soil Suitability: While ground screws are highly adaptable, certain soil types, such as loose, sandy soils, may require additional stabilization or alternative solutions. Performing a soil analysis can help determine if ground screws are best for a particular project.
  2. Installation Expertise: While quick to install, ground screws require precision and experience to ensure they are set at the correct depth and angle for maximum stability. Working with an experienced installer or choosing high-quality ground screws from a reputable manufacturer like SIC Solar can help avoid common installation problems.

Concrete Piles for Solar Foundations

Concrete piles involve digging holes, placing rebar or metal supports, and pouring concrete to form a stable foundation. This traditional foundation type is widely used in construction and provides a highly durable foundation for solar panels. SIC Solar ​​mounting system also works with concrete foundations, although there are some unique considerations for concrete piles.

Advantages of Concrete Piles

  1. High Stability and Load-bearing Capacity Concrete piles have significant stability and can support heavy loads, making them ideal for installing large solar arrays in areas with loose or shifting soils, where ground screws may not be as effective. This stability is useful in locations with high winds, where the added weight is beneficial.
  2. Wide Availability and Familiarity Concrete foundations are a well-established option in the construction industry, and installation expertise is widely available. Many contractors are familiar with concrete installation, which can make it easier to find qualified professionals to do the job.
  3. Long Life Concrete piles are known for their long-lasting durability. If installed correctly, they can provide a solid foundation for decades, making them ideal for permanent solar installations.

Disadvantages of Concrete Piles

  1. Long Installation Time Concrete piles require excavation, concrete pouring, and curing time, which can delay project timelines. On average, concrete takes at least a day to cure before installation, which lengthens the installation process compared to ground screws.
  2. Higher Environmental Impact The concrete industry has a significant carbon footprint, and the process of installing concrete piles can be invasive, involving extensive excavation and soil disruption. In environmentally sensitive areas, concrete piles may not be the most sustainable option. ​​
  3. Permanent and Less Flexible Once installed, concrete piles are difficult to remove and can have a lasting impact on the site. In contrast, ground screws can be removed and relocated when necessary, providing greater flexibility for temporary solar installations or projects where future site restoration is important.

ground screw piles

Choosing Between Ground Screws and Concrete Piles

The choice between ground screws and concrete piles depends largely on project requirements, site conditions, and environmental considerations. Ground screws are increasingly popular for their speed, adaptability, and low environmental impact. However, for large, heavy solar installations where load-bearing capacity is critical, concrete piles may still be the preferred choice.

For projects with complex terrain, time constraints or environmental sensitivity, SIC Solar ​​ground screws offer a robust and adaptable solution. At the same time, for large projects where permanent, heavy foundations are essential, concrete piles may still be the preferred choice.

Are wall mounted solar panels efficient?

Solar power is now being utilized as a diverse form of energy to harvest renewable sources, there are multiple ways to implement this in different environments. Among this, solar-powered panels that are mounted on the wall are an alternative to traditional rooftop or ground-based installations.

solar panels for walls


How do solar powered walls operate?<

These panels are connected to the vertical or sloping facades of buildings via specialized hardware or frames, such as those provided by SIC Solar. This method is particularly beneficial in urban areas, because the roof space or ground area is limited.


Factors that affect the effectiveness of solar-powered panels mounted on the wall.
  1. Wall orientation and tilt angle

    • The direction and slope of the walls have a significant impact on the amount of sunlight that the panels can receive.
    • The southern walls in the northern hemisphere are more beneficial because the sunlight is more abundant.
  2. Shading
    While the tilt angle can be adjusted to improve efficiency, Wall mounted systems offer less flexibility compared to roof setups. Shading, Wall mounted panels are more susceptible to shading from adjacent structures or the building itself, which can greatly affect power output. Choosing the best installation location is critical.

  3. Sunlight exposure
    Walls typically receive less direct sunlight than rooftops, especially at certain times of day, which results in a reduction in potential energy production depending on the design and orientation of the building.

  4. Seasonal change
    Wall mounted solar panels may perform better during periods of low sun, such as winter, but their efficiency may decrease during summer when the sun is higher.


Advantages of Wall mounted Solar Panels
  1. Space efficiency
    These panels are ideal for houses with limited roof or ground space, leveraging otherwise unused vertical surfaces.

  2. Architectural harmony
    Modern design can be seamlessly integrated with architectural aesthetics to create a modern appearance.

  3. Thermal efficiency
    Wall mounted solar panels can provide additional insulation, reducing heat transfer through the walls and increasing the energy efficiency of the building.

  4. Easy to maintain
    Wall mounted systems are usually more accessible than rooftop systems, thus simplifying cleaning and maintenance.


Challenges of Wall mounted Solar Panels
  1. Lower Energy Output
    The vertical position of Wall mounted panels means they typically receive less sunlight, especially when they are not facing south.

  2. Higher Risk of Shading
    Urban environments can cast a noticeable shadow on the panels, affecting their performance.

  3. Installation Complexity
    The structural requirements for installing panels on walls may require additional support, which increases costs.

  4. Angle Adjustments
    Compared to ground or roof systems, the adjustability of panel angles is limited, which may affect efficiency in some cases.


How SIC Solar Supports Wall mounted Solar Panel Systems

SIC Solar are experts in the production of high-quality solar mounted systems, including systems specifically designed for Wall mounted applications. Their brackets are carefully designed to securely attach and position optimally, ensuring durability and performance. SIC Solar expertise helps overcome the challenges of Wall mounted systems and maximize their benefits.


Are Wall mounted Solar Panels Right for You?

Although Wall mounted solar panels may not be as efficient as rooftop or ground-mounted solar panels, they are suitable for specific situations.

  • Urban Environments: Ideal for buildings with limited rooftop space or shaded rooftops.
  • Aesthetic Preference: Suitable for those who enjoy modern, integrated design.
  • Seasonal Advantages: Vertical panels can capture low-angle sunlight during the winter months.

For best results, it is crucial to analyze the sunlight and shade of a specific site.With SIC Solar reliable installation solutions, Wall mounted solar systems can be an effective and sustainable energy option for unique installation needs.


Wall mounted solar panels offer a creative and practical way to capture solar energy in confined spaces. While their efficiency may vary, careful planning and reliable installation solutions can ensure they make a significant contribution to renewable energy production.

Can Solar Panels Be Installed on an Asbestos Roof?

Asbestos roofing is a sensitive topic due to the material's health hazards and the challenges associated with its handling. While it is technically possible to install solar panels on an asbestos roof, doing so requires careful planning, strict adherence to safety regulations, and specialized mounting solutions.


Understanding Asbestos Roofs

Asbestos was once a popular roofing material due to its durability, fire resistance, and insulation properties. However, it has since been widely banned or regulated because of its hazardous fibers, which can cause serious health issues if disturbed. Despite this, many older buildings still have asbestos roofs, which pose unique challenges for solar installations.


Challenges of Installing Solar Panels on Asbestos Roofs

  1. Fragility of the Material
    Asbestos roofs, especially older ones, can be brittle and prone to cracking, making them difficult to work on without causing damage.

  2. Health and Safety Concerns
    Drilling or cutting into asbestos releases fibers into the air, which are dangerous when inhaled. Strict regulations govern how asbestos roofs can be handled during construction or renovations.

  3. Limited Load-Bearing Capacity
    Some asbestos roofs may not have the structural integrity to support the weight of solar panels, mounting systems, and additional hardware.

  4. Regulatory Restrictions
    Many regions require permits and inspections before any work can be done on an asbestos roof, including solar panel installations.


Solutions for Installing Solar Panels on Asbestos Roofs

  1. Avoid Penetration
    Penetrating the roof surface should be avoided whenever possible. Non-invasive mounting systems, such as ballast-based solutions or clamp systems, are ideal for asbestos roofs.

  2. Use Lightweight Systems
    Lightweight solar mounting systems, like those offered by SIC Solar, reduce the stress on the roof while maintaining durability and performance.

  3. Engage Certified Professionals
    Any work involving asbestos must be conducted by licensed professionals trained in safe handling and installation practices.

  4. Strengthen the Roof Structure
    In cases where the roof’s integrity is questionable, additional reinforcement or partial roof replacement may be necessary before installing solar panels.


Non-Penetrative Mounting Options

One of the safest methods for mounting solar panels on an asbestos roof is using non-penetrative systems.

  • Ballasted Mounting Systems
    These rely on weights to secure the solar panels without drilling into the roof. They are particularly useful for flat or slightly sloped asbestos roofs.

  • Clamping Systems
    Designed to attach to the edges or ridges of the roof without penetrating the surface, clamps provide a secure base for the panels.

  • Specialized Frames
    Custom frames can be built around the roof to support the solar panels, bypassing the asbestos material entirely.

SIC Solar offers tailored solutions for challenging roof types, including non-penetrative options. Their high-quality aluminum and stainless steel systems ensure reliability and longevity without compromising roof integrity.


Steps to Install Solar Panels on an Asbestos Roof

  1. Assessment and Planning

    • Evaluate the roof’s condition and load-bearing capacity.
    • Conduct an asbestos risk assessment and obtain necessary permits.
  2. Choose the Right Mounting System
    Opt for non-invasive systems that minimize disturbance to the asbestos material. SIC Solar pre-assembled kits are ideal for such scenarios.

  3. Prepare the Roof
    Engage certified professionals to clean and prepare the roof safely, ensuring no fibers are released.

  4. Install the Panels
    Mount the solar panels using the chosen system, ensuring all work complies with safety regulations.

  5. Regular Maintenance
    Inspect the installation periodically to ensure the roof remains intact and the solar system operates efficiently.


Benefits of Installing Solar Panels on Asbestos Roofs

  1. Maximizing Unused Space
    Solar installations make use of existing roof space, transforming it into an energy-generating asset.

  2. Reducing Energy Costs
    By installing solar panels, property owners can lower electricity bills and reduce reliance on fossil fuels.

  3. Sustainability
    Solar panels contribute to renewable energy generation, helping offset the environmental impact of asbestos roofs.


Why SIC Solar?

SIC Solar specializes in providing innovative mounting systems for challenging roofing scenarios, including asbestos roofs.

  • Non-Invasive Solutions: Their mounting systems minimize the need for drilling or cutting into fragile materials.
  • Custom Designs: SIC Solar offers adaptable designs that cater to specific roof types and customer needs.

pitched roof solar mounting

Do solar panels work well on a flat roof?

Flat roofs are increasingly becoming popular locations for solar panel installations due to their unique benefits and versatility. While they may differ from traditional pitched roofs in design and installation requirements, solar panels can perform extremely well on flat roofs when paired with the right mounting solutions. Companies like PV mounting system experts SIC Solar offer tailor-made solutions to maximize the efficiency and durability of flat roof solar installations.


Why Flat Roofs Are Good for Solar Panel Installations

Optimal Angle Customization

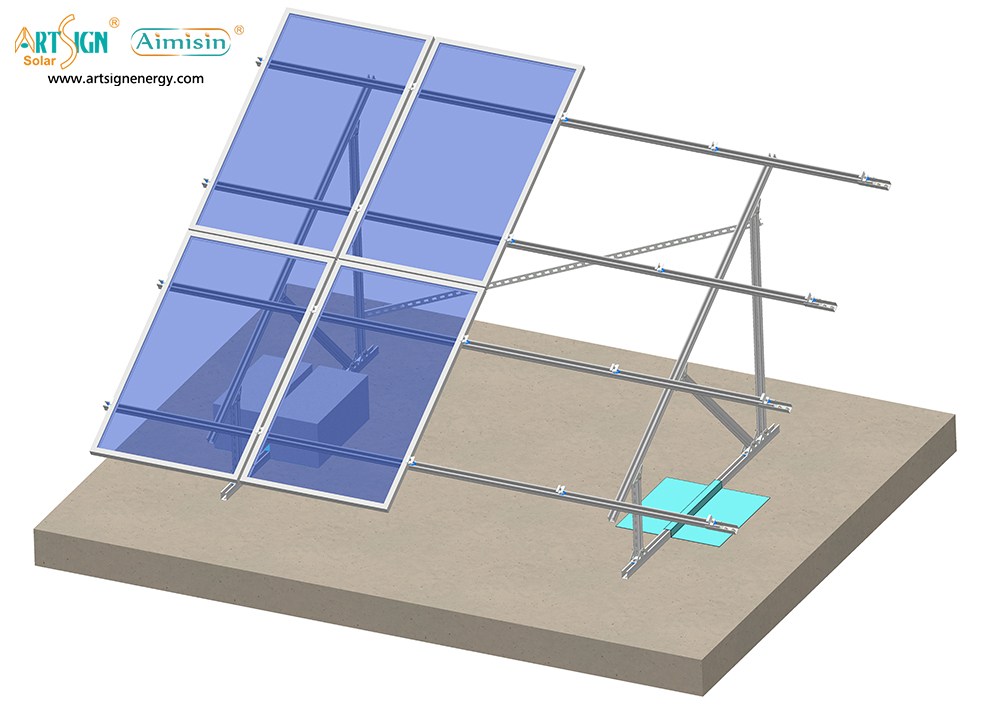
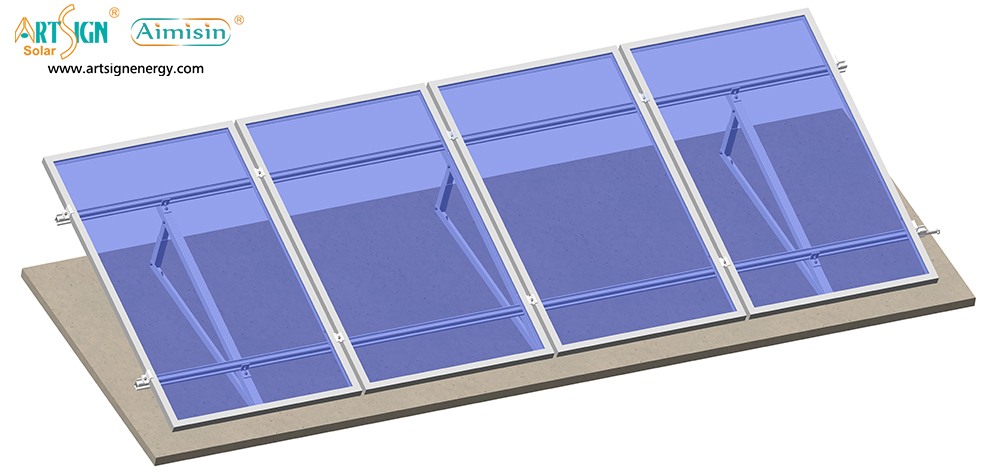
Unlike pitched roofs, flat roofs offer the flexibility to adjust the angle and orientation of solar panels for maximum sunlight exposure. Panels can be mounted using an adjustable rack system that optimizes the tilt based on geographic location and seasonal sun path, ensuring the highest energy yield.

Space Utilization

Flat roofs often feature wide, unobstructed spaces that are ideal for placing multiple panels. This setup is particularly beneficial for commercial buildings, warehouses, and even residential properties with wide flat roofs. The extra space allows for creative layouts, including systems that incorporate walkways or maintenance spaces.

Easy Installation and Maintenance

Flat roofs are easier for workers to access and safer than steeply pitched roofs. This convenience simplifies the installation process and reduces long-term maintenance costs, making flat roof solar systems an affordable option.


Challenges of Installing Solar Panels on Flat Roofs While flat roof installations offer many advantages, there are specific challenges to installation that must be addressed to achieve optimal performance:

Drainage Issues

Flat roofs can collect water and debris, which can affect the performance of your solar system. Proper drainage systems and elevated mounting solutions are essential to prevent these issues.

Wind Load Issues

Solar panels on flat roofs are more susceptible to wind forces, especially when tilted. To combat this, SIC Solar offers specialized mounting systems designed with aerodynamic profiles and ballasted bases that provide stability without compromising performance.

Weight Distribution

Flat roofs may have load restrictions, so the weight of the solar panels, mounting system, and ballast must be carefully calculated. SIC Solar offers lightweight and durable mounting options that evenly distribute weight across the roof surface.


Types of Mounting Systems for Flat Roof Solar Panels

Ballasted Mounting Systems

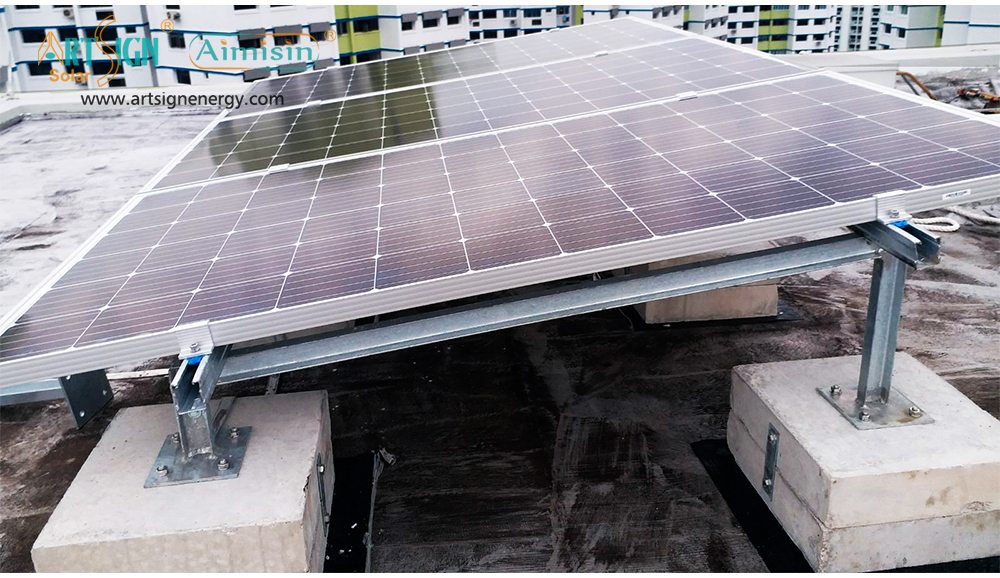
Ballasted systems are a popular choice for flat roofs because they do not require penetrations through the roof. A weighted base keeps the panels secure, and this design minimizes damage to roofing materials. These systems are ideal for buildings with load-bearing capacity.

Fixed-Tilt Systems

Fixed-tilt systems are preset to an angle that maximizes solar power generation in a specific location. They offer a cost-effective solution for flat roof installations while providing consistent performance.

Adjustable-Tilt Systems

These systems allow for seasonal angle adjustments, allowing for optimal energy production year-round. While they may require periodic maintenance, their flexibility can significantly increase annual energy production.

East-West Systems

East-West systems are an excellent choice for properties looking to maximize energy production throughout the day. These setups reduce shading between rows and allow for more panels to be installed in a given space, maximizing return on investment.


Advantages of Flat Roof Solar Panels Enhanced Aesthetics

Since flat roof solar panels are not visible from the ground, they maintain the visual appeal of the building while still providing renewable energy benefits.

Scalability

Flat roofs can accommodate more panels over time, allowing the system to expand as energy needs grow. This feature is particularly useful for commercial properties seeking future-proof energy solutions.

Energy Efficiency and Sustainability

Installing solar panels on flat roofs reduces energy costs and lowers a building’s carbon footprint, helping to achieve sustainable development goals. Businesses and homeowners can benefit from reduced utility bills and tax incentives for adopting renewable energy.


How SIC Solar Supports Flat Roof Solar Installations SIC Solar offers a range of mounting systems designed specifically for flat roof solar applications. Their products are carefully engineered to balance performance, durability, and ease of installation. Key features of SIC Solar ​​flat roof solutions include:

Corrosion resistance: ensures longevity in varying environmental conditions.

Lightweight design: ideal for load-constrained roofs.

Aerodynamic profile: reduces wind resistance and enhances system stability. SIC Solar ​​expertise in flat roof mounting systems ensures reliable, high-performance solutions that meet the specific needs of each project.

solar panel flat roof tilt mount

How Are Solar Panels Fixed to the Ground?

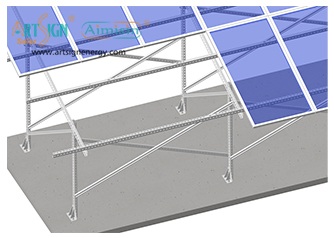
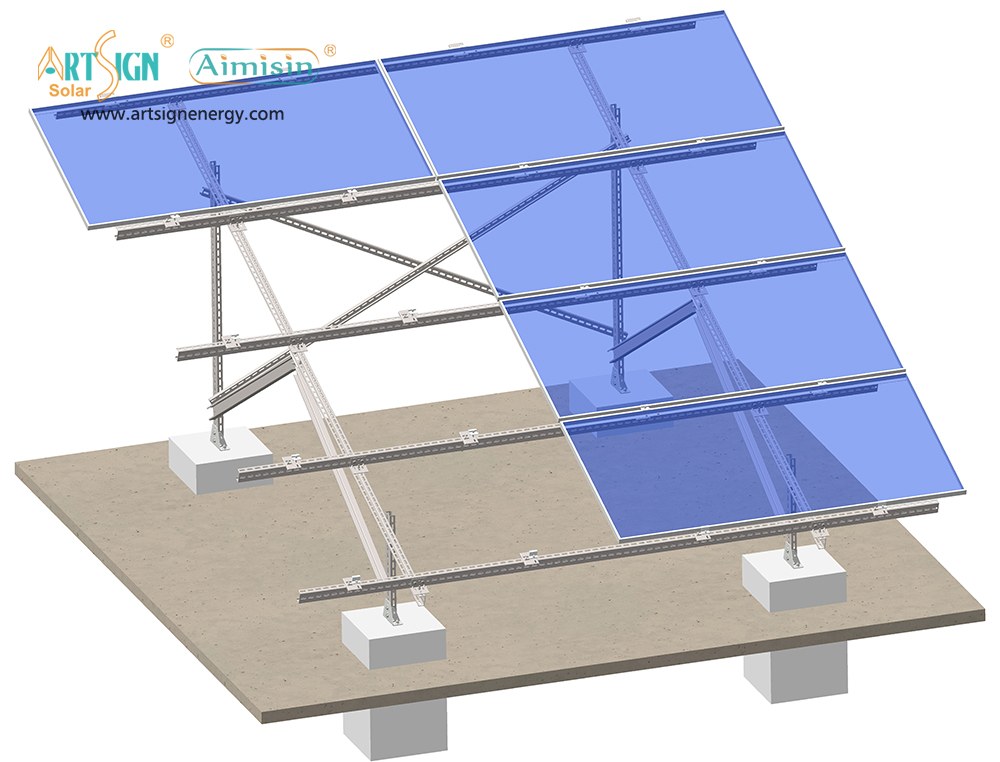
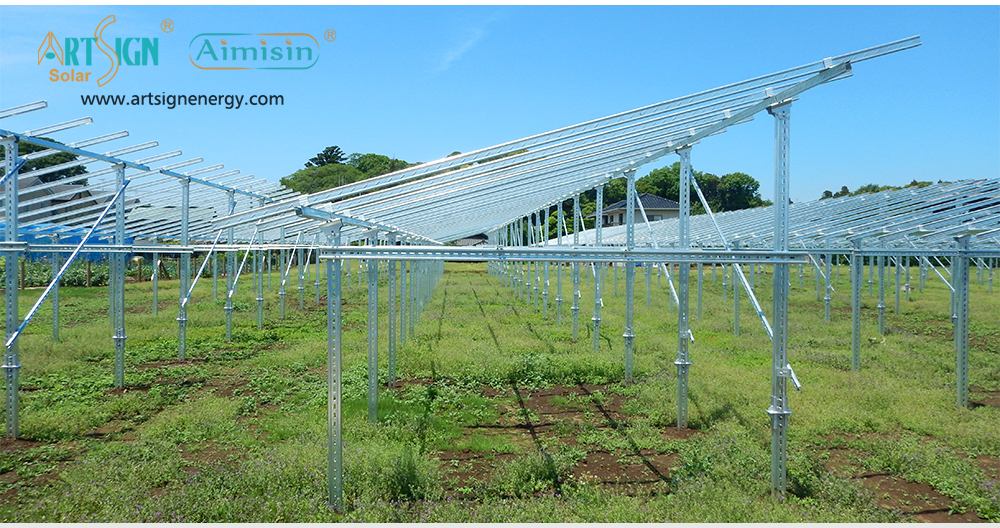
Solar ground mount systems are an excellent solution for maximizing the use of open area solar energy. Unlike rooftop installations, ground mount systems are flexible in terms of panel orientation and tilt angle.

Types of ground mounted solar systems

There are two main types of ground-mounted systems, each suitable for different applications:

Fixed Tilt System

The panels are installed at a fixed angle to optimize the maximum amount of sunlight throughout the year.

The simpler design, lower cost, and minimal maintenance make it an ideal choice for small and medium-sized projects.

tracking system

Solar panels move to follow the sun's path, increasing energy production by 15-25%.

Due to the high installation and maintenance costs, it is usually used in large solar farms.

How to fix solar panels to the ground

The choice of installation method depends on factors such as soil type, climatic conditions, and project size. The following are the most common techniques:

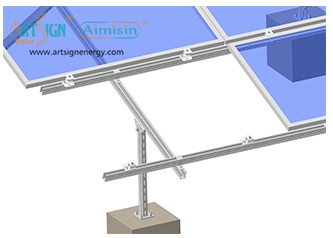
1. Floor screw

Description: Spiral ground screws are drilled into the soil to provide a stable foundation.

Advantages:Installation is fast and has minimal impact on the environment.Suitable for a variety of soil types, including rocky or uneven terrain.

Use case: Residential and commercial projects that require rapid deployment.

2. Concrete foundation

Description: Pour concrete into the excavated hole to create a solid foundation for the installation structure.

Advantages:It is extremely stable and durable even in areas with strong winds or snow loads.Suitable for projects in sandy or unstable soil conditions.

Use case: Permanent installations, such as utility-scale solar farms.

3. Ballast system

Description: The weighted block holds the mounting system in place without penetrating the ground.

Advantages:Ideal for areas with limited ground penetration, such as landfills.The damage to the ground is minimal, making it easy to reposition.

Use case: temporary or semi-permanent installation.

4. Piling foundation

Description: Drive steel or aluminum piles into the ground to secure the installation structure.

Advantages:Quick and efficient installation process.It is suitable for large-scale projects with stable soil conditions.

Use cases: utility-scale solar farms and large commercial projects.

Steps to fix solar panels to the ground

on-site evaluation

Analyze soil types, topography, and environmental factors.Perform geotechnical tests to determine the most suitable installation method.

Basic preparation

Remove debris from the scene and level the ground as needed.Mark the location of the installation foundation according to the solar array layout.

Install the installation foundation

Screw in ground screws, pour concrete foundations or place ballast blocks as needed.Ensure correct alignment and spacing for maximum panel efficiency.

Assembly and installation structure

Attach a rail or beam to the foundation.Check the levelness and structural stability.

Install solar panels

Secure the panel to the rail using the middle and end clamps.Adjust the tilt angle to optimize sunlight exposure.

Wiring and testing

Connect the panel to the inverter or charge controller.Test the system to ensure proper function and energy output.

The advantages of ground-mounted solar systems

Scalability: Easy to scale to meet growing energy demand.

Optimal efficiency: Flexible orientation and tilt adjustments maximize energy production.

Accessibility: Simplified maintenance and cleaning compared to rooftop systems.

ground mounted solar panel frames

Why Choose SIC Solar Ground Mount System?

SIC Solar specializes in durable and efficient photovoltaic installation solutions tailored for ground-mounted applications. Their products include:

Floor screws: corrosion-resistant, suitable for a variety of soil types.

Piling system: Designed for large projects with high wind resistance.

Ballast construction: Reliable and suitable for non-penetrating installations.

SIC Solar commitment to quality and innovation ensures the long-term success of every project, from small installations to utility-scale solar farms.

With SIC Solar reliable and versatile installation solutions, you can build a durable and efficient ground-mounted solar system that fits your unique project requirements with confidence.

How Are Solar Panels Fixed to Tiles?

Installing solar panels on tiled roofs requires careful planning and precision to ensure the system is securely attached without damaging the tiles or compromising the roof integrity. 


The Challenges of Installing on Tiled Roofs

  1. Fragility of Tiles
    Tiles, especially clay and ceramic tiles, are prone to cracking or cracking during installation.

  2. Roof Waterproofing
    Drilling or installation misalignment can create gaps, which can lead to potential leakage.

  3. Variety of Tile Designs
    Tiles come in a variety of shapes (flat, curved, or interlocking), so it is crucial to choose an adaptable mounting system.

  4. Aesthetic Concerns
    Visible and misaligned systems can damage the appearance of the roof.


Methods for Fixing Solar Panels to Tiles

  1. Tile Replacement Brackets

    • How It Works: Replace some roof tiles with metal brackets that mimic the original tile shape.
    • Advantages: Maintain the water resistance of the roof without drilling holes in the tiles.
    • Application: Commonly used in clay, concrete and ceramic tiles.
  2. Hook-Based Mounting Systems

    • How It Works: Stainless steel hooks slide under existing bricks and attach to the roof structure.
    • Advantages: Prevents direct contact or drilling into the tiles.
    • Compatibility: Suitable for curved or interlocking tiles.
    • Example: SIC Solar tile hooks are designed for easy installation and long-lasting durability.
  3. Adhesive and Rail-Free Systems

    • How It Works: Adhesive-mounted bases are used, eliminating the need for traditional rails.
    • Advantages: Lightweight and ideal for preserving roof integrity.
    • Considerations: Requires thorough cleaning of the tile surface for proper adhesion.
  4. Drill and Seal Technique

    • How It Works: Drilling into the tile and roof structure with proper sealing to prevent leaks.
    • Advantages: Provides a strong and permanent installation.
    • Caution: Precision is essential to avoid cracking tiles or creating weak points.

tile roof solar mounting brackets


Key Steps for Installing Solar Panels on Tiles

  1. Assess the Roof Type
    Understand the tile material (e.g., clay, slate, or concrete) and design to select the most suitable mounting system.

  2. Prepare the Area

    • Remove debris and inspect tiles for cracks or damages.
    • Replace damaged tiles to ensure a stable foundation.
  3. Select the Right Mounting System

    • For curved tiles, consider hook-based systems.
    • For flat tiles, replacement brackets or adhesive systems may be ideal.
  4. Install the Mounting Brackets

    • Attach the brackets or hooks to the roof structure (rafters or beams) for stability.
    • Ensure proper alignment and spacing based on panel dimensions.
  5. Place the Rails and Panels

    • Attach rails to the brackets for a secure base.
    • Mount the solar panels onto the rails, ensuring even distribution of weight.
  6. Seal and Inspect

    • Apply waterproof sealant to any drilled areas.
    • Conduct a final inspection to check for gaps, loose components, or tile damage.

Benefits of Tile Roof Solar Panel Systems

  • Durable Installation: Properly mounted systems last decades without compromising roof integrity.
  • Energy Efficiency: Tile roofs, known for their insulation properties, complement solar panels in optimizing energy performance.
  • Aesthetic Appeal: Professional mounting systems, such as those offered by SIC Solar, provide a clean and streamlined appearance.

Why Choose SIC Solar for Tiled Roof Mounting Systems?

SIC Solar offers a range of high-quality photovoltaic mounting solutions tailored to various roof types, including tiled roofs. Their innovative designs, such as tile hooks and replacement brackets, prioritize durability, ease of installation, and waterproofing. SIC Solar's commitment to quality ensures that solar panel installations remain secure and efficient throughout their lifespan.


Mounting solar panels on tiled roofs can be a seamless process when using the right tools and methods. By choosing specialized components like those provided by SIC Solar and following best practices, homeowners can enjoy a long-lasting and visually appealing solar energy system.

How Do You Seal the Gap Between Solar Panels?

Sealing the gaps between solar panels is essential for a variety of reasons, including water resistance, anti-debris, improved wind resistance, and aesthetics.

The importance of sealing gaps in solar panel installations:

  1. Waterproofing: Seals channel water out of vulnerable areas, preventing rainwater from seeping into crevices and damaging roofs or substructures.
  2. Anti-debris: Sealing minimizes the accumulation of leaves, dust, and other debris in the panel crevices, which can impede airflow and reduce panel efficiency.
  3. Improved wind resistance: A well-sealed array enhances stability and protects the installation from wind lift during storms.
  4. Aesthetics: Sealed, cohesive solar panel arrays provide a cleaner, more professional appearance.

Technology for sealing the gaps between solar panels:

  1. Weatherproof Flashing: Installed between panel rows or at the edges, flashing guides water away from gaps and is durable and highly effective in preventing water infiltration.
  2. Rubber Sealing Strip and gasket: Special tape or rubber gasket can fill small gaps between panels, making it easy to install and cost-effective.
  3. Rain gutters: Some installation systems integrate channels similar to rain gutters to redirect water flow, which is very useful for pitched roofs that are worried about water loss.
  4. UV-resistant silicone sealants: These sealants are used to fill gaps and form a waterproof barrier, making them versatile and compatible with a wide range of panel types.

Integrated sealing solutions: High-quality installation systems typically include pre-designed sealing mechanisms, such as those from SIC Solar, which feature precision-engineered components for tight panel alignment and enhanced sealing performance.

rubber seal strips

Steps to effectively seal the gap:

  1. Examine the gaps: Evaluate the spacing between panels and measure the gaps to determine the appropriate sealing solution.
  2. Cleaning areas: Remove dust, debris, or moisture from crevices to ensure proper bonding of tape, gasket, or sealant.
  3. Select the right material: Choose materials specifically designed for solar applications, such as UV-resistant sealants or high-durability tape.
  4. Apply sealing assembly: Install waterproof board, tape or sealant according to manufacturer's instructions to ensure there are no air pockets.
  5. Testing and maintenance: After installation, check for leaks or vulnerabilities and perform regular maintenance to ensure that the sealing solution remains effective.
  6. The benefits of properly sealed solar panels include:
  7. Increased efficiency: Sealed systems reduce downtime due to weather-related issues or debris build-up.
  8. Extended service life: Protecting the roof and bracket system minimizes wear and tear.
  9. Reduce maintenance costs: Preventive sealing can reduce the need for frequent maintenance.

How SIC Solar can help:

SIC Solar is a trusted manufacturer of photovoltaic installation systems that simplify the installation process and improve system reliability. Their innovative designs include features such as integrated water management and precision engineering to ensure panels are securely aligned with minimal clearance. By using SIC Solar's installation solutions, installers can achieve professional-grade sealing and long-lasting system performance.

In summary, sealing the gaps between solar panels is a critical step in any solar installation. Whether through waterproof panels, sealing tape or an advanced installation system, ensuring a waterproof and debris-free installation protects your investment and increases the efficiency of your solar system. Working with experts such as SIC Solar ensures your project is equipped with the best materials and technology, guaranteeing years of reliable performance.

How Do You Use Solar Mounting Brackets?

Solar mounting brackets play a key role in the successful installation of solar panels. They provide the necessary support to keep the solar panel firmly in place while optimizing its angle for maximum efficiency. Whether rooftop, ground or wall mounted, choosing and using the right mounting brackets ensures durability and performance.

SIC Solar is a company specializing in the production and sale of photovoltaic installation systems, providing high-quality solar installation solutions for a variety of installation needs. Below, we will explore how to effectively use solar mounting brackets and the key factors to consider during the installation process.


Understanding Solar Mounting Brackets

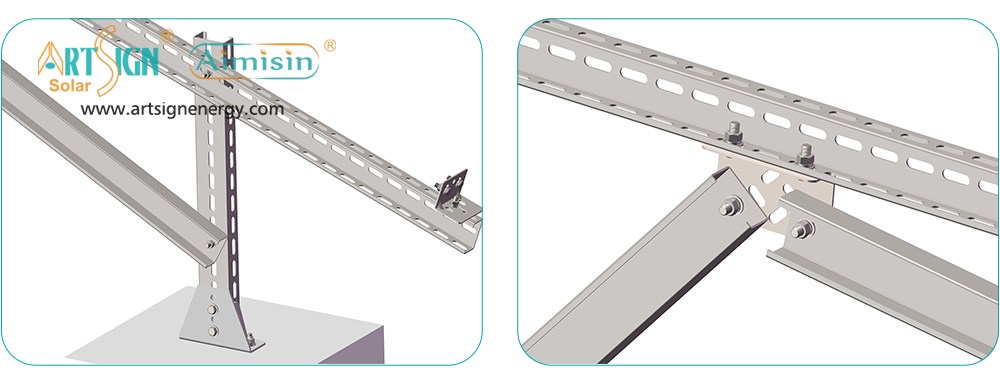
Solar mounting brackets are structural components used to fix solar panels. They come in a variety of types to suit different installation scenarios, such as:

  1. Rooftop Mounting Brackets: Designed for pitched or flat roofs.
  2. Ground Mounting Brackets: Solar systems for ground mount.
  3. Adjustable Brackets: Allows to adjust the angle to maximize the use of sunlight.
  4. Specialized Brackets: Include options for walls, carports, or other unique structures.

These brackets are usually made of durable materials such as aluminum or stainless steel, ensuring that they can withstand severe weather conditions.

solar panel ground stand


Steps to Use Solar Mounting Brackets

  1. Evaluate the Installation Site

    • Roof Installations: Check the material, slope and structural integrity of the roof. Metal roofs usually work well with upright seam supports, while flat roofs may require ballast or bonding systems.
    • Ground Installations: Ensure that the ground is level and stable to support the brackets.
  2. Choose the Right Brackets
    Select brackets that are compatible with your solar panels and mounting surfaces. For example:

    • Tilt Brackets: Ideal for optimizing the angle of solar panels on flat roof or ground systems.
    • Standing Seam Clamps: Secure panels to metal roofs without drilling.
      SIC Solar offers a variety of bracket options to meet different requirements.
  3. Prepare the Mounting Surface

    • Clean the surface to remove dirt or debris.
    • Mark the location where the bracket will be installed to ensure proper alignment.
  4. Install the Brackets

    • For drilling systems, use screws or bolts to securely secure the bracket to the roof or ground. Make sure the borehole is properly sealed to prevent leaks.
    • For non-drilling systems, such as ballast brackets or bonded brackets, place the brackets according to the design specifications.
  5. Attach the Solar Panels

    • Secure the solar panels to the brackets using mid and end clamps. Adjust the positioning to align the panels with the mounting structure.
    • Tighten all connections to ensure the panels are stable and won’t move in high winds.
  6. Check Stability
    Check the entire system to ensure that the brackets and panels are firmly fixed. Test the structure's resistance to external forces such as wind or weight.


Best Practices for Using Solar Mounting Brackets

  1. Angle Optimization
    Adjust the bracket to position the solar panel at the ideal tilt angle, which varies by geography. The right angle maximizes sunlight exposure, resulting in increased energy production.

  2. Weatherproofing

    • Use corrosion-resistant brackets and fasteners to ensure long-lasting performance.
    • Apply sealant when necessary, especially for roof installations, to prevent leakage.
  3. Regular Maintenance
    Periodically inspect the brackets for signs of wear, rust, or looseness. Tighten any loose parts and replace damaged brackets promptly.

  4. Customization
    For unique installations, such as solar carports or balcony systems, custom brackets may be required. SIC Solar specializes in providing tailor-made solutions for a variety of project needs.


Advantages of Using High-Quality Solar Mounting Brackets

  1. Stability and Durability

    The well-designed bracket securely holds the solar panels in place, even in extreme weather conditions.

  2. Efficiency Optimization
    The adjustable stand allows users to fine-tune the panel angle to ensure maximum capture of solar energy.

  3. Ease of Installation
    Modern brackets are designed for quick and straightforward installation, saving time and labor costs.

  4. Versatility
    Solar mounting brackets come with options for different surfaces and mounting styles, adapting to a variety of projects.


How SIC Solar Supports Solar Mounting Needs

SIC Solar offers best-in-class photovoltaic installation solutions, including a wide range of solar mounting brackets. Its products are designed to be rugged, easy to use and compatible with a wide range of solar panel types. SIC Solar is committed to quality and innovation, ensuring reliable performance in all installation scenarios, whether on the roof, ground or custom structures.

How Should Solar Panels Be Mounted?

Installing solar panels is a meticulous process that significantly impacts their performance, longevity, and safety. Whether you're setting them up on your rooftop, the ground, or a bespoke structure, the right mounting system is crucial for securing your solar array and ensuring it captures the maximum amount of sunlight.

When it comes to mounting solar panels, there are several key considerations:

1. Location and Orientation: To maximize sunlight exposure, panels should face the direction that gets the most sun. Typically, in the Northern Hemisphere, this means a south-facing orientation. The tilt angle should also be adjusted to match the local latitude for peak efficiency.

2. Mounting Surface: The type of surface you're mounting on—be it a rooftop, which can vary from metal to shingle to tile, or the ground—dictates the kind of mounting system you'll need.

3. Wind and Snow Loads: Your mounting system must be robust enough to handle local weather conditions, including strong winds and heavy snowfall.

4. Accessibility: It's important that the panels remain accessible for maintenance and cleaning without compromising safety.

5. Type of Mounting System: Depending on the scale of your project, your budget, and your performance objectives, you'll choose between a fixed or adjustable mounting system.

Common types of solar panel mounting systems include:

- Rooftop Mounting Systems: These can be flush-mounted for a sleek look or tilted for better sunlight exposure. Ballasted mounts are also an option, offering a non-penetrating solution for flat roofs.

- Ground Mounted Systems: Fixed-tilt frames are suitable for year-round performance, while tracking systems follow the sun's path to boost energy production.

- Custom Mounting Solutions: These can include carports, pergolas, or balcony mounts, offering creative ways to integrate solar panels into various structures.

Here's a step-by-step guide to mounting solar panels:

1. Prepare the Site: Assess the site for optimal sunlight and structural soundness, and clear any obstacles that might cast shadows.

2. Select the Mounting System: Choose a system that fits your installation surface and project needs. SIC Solar offers a variety of solutions, from roof hooks to ground screws and ballasted systems.

3. Install the Mounting Structure: Attach the mounting system securely to the roof or ground, ensuring it's level and properly aligned for panel placement.

4. Mount the Solar Panels: Securely fasten the panels to the mounting rails using the appropriate hardware. Ensure each panel is fixed and angled correctly to capture the most sunlight.

5. Connect Electrical Components: Wire the panels to the inverter or charge controller, adhering to safety guidelines to prevent hazards.

6. Test the System: Conduct a thorough inspection to ensure stability and functionality, and monitor the energy output to confirm optimal performance.

High-quality mounting systems play a vital role in:

- Structural Stability: They protect against environmental forces like wind and snow.

- Efficient Performance: They maintain the best angle and orientation for sunlight capture.

- Long-Term Durability: They're made from materials that resist corrosion and wear over time.

SIC Solar specializes in providing mounting systems that meet these criteria. They offer:

- Rooftop Mounting Kits: Compatible with various roof types, including corrugated metal and tile.

- Ground-Mount Frames: Sturdy and adaptable to different terrains.

  • Custom Solutions: Tailored designs for unique projects, such as carports and pergolas.

solar ground mounting structure

Mounting solar panels correctly is essential for achieving the best energy efficiency and system life. By taking into account factors like location, orientation, and weather conditions, you can select the most suitable mounting system for your solar project. SIC Solar innovative and durable mounting solutions ensure that your solar panels are installed securely and are optimized for performance, whether you're working on a residential rooftop or a large-scale ground-mounted system. SIC Solar has the expertise and products to support your renewable energy objectives.